DSLR's automatically select exposure control, and while the decisions that camera makes are adequate, there are situations where actual results do not meet "artistic" expectations.
For example:
When photographing a sunset, capturing breathtaking colors is of the essence to showcase the dramatic event. Most will find that when photograph is taken, the colors look a bit washed out and plain. On the other hand, when trying to photograph a mid-tone or a dark object that is located next to a source of light (such as an object placed next to a window on a sunny day), the resulting photograph lacks details, and focal point of the composition appears dark and dimensionless.
To avoid this, use exposure compensation to override settings that camera thinks are correct for a given lighting conditions. This feature is accessible on DSLR when switched to any of the custom modes, such as P (programmed), A (aperture priority), S (shutter speed priority) or M (manual). Refer to your camera manual on accessing exposure control scale.
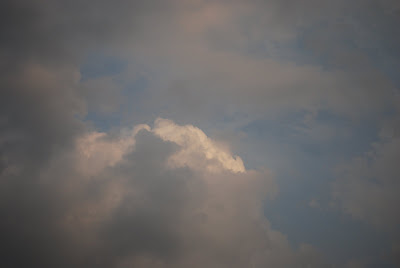
In the example of the sunset, deliberate under-exposing will bring out the vibrant colors. By using EV scale, move the marker in the negative direction. Each shift will cause the exposure to darken by the factor of two. Hence, EV value of -1 will yield to exposure twice as dark, and value of -2 will yield to exposure four times darker, etc...


In the second example of photographing an object next to a light source, deliberate over-exposing will allow to see the details with clarity and dimension. To over-expose the photograph, move the maker on EV scale in the positive direction. Just as with negative exposure values, the EV value will adjust exposure compensation by a factor of two.
 automatic exposure at EV 0
 exposure compensation at EV +5 helps to bring out the detail otherwise lost
Experimenting is essential in the process. Begin by adjusting the exposure scale in the desired direction at the smallest interval, gradually increasing until desired results are met. Once behavior of the camera is learned, the intuitively correct compensation adjustment will become a second nature.
Of course, if you shoot in RAW, exposure adjustment can be easily achieved by modifying the photograph via image editing software (such as Adobe Camera Raw). JPEG encoded images can also be adjusted for exposure, however, the results are limited as not as much information is stored in this format.
For example:
When photographing a sunset, capturing breathtaking colors is of the essence to showcase the dramatic event. Most will find that when photograph is taken, the colors look a bit washed out and plain. On the other hand, when trying to photograph a mid-tone or a dark object that is located next to a source of light (such as an object placed next to a window on a sunny day), the resulting photograph lacks details, and focal point of the composition appears dark and dimensionless.
To avoid this, use exposure compensation to override settings that camera thinks are correct for a given lighting conditions. This feature is accessible on DSLR when switched to any of the custom modes, such as P (programmed), A (aperture priority), S (shutter speed priority) or M (manual). Refer to your camera manual on accessing exposure control scale.
In the example of the sunset, deliberate under-exposing will bring out the vibrant colors. By using EV scale, move the marker in the negative direction. Each shift will cause the exposure to darken by the factor of two. Hence, EV value of -1 will yield to exposure twice as dark, and value of -2 will yield to exposure four times darker, etc...
automatic exposure at EV 0

exposure compensation at EV -3 helps to bring out vibrant colors
In the second example of photographing an object next to a light source, deliberate over-exposing will allow to see the details with clarity and dimension. To over-expose the photograph, move the maker on EV scale in the positive direction. Just as with negative exposure values, the EV value will adjust exposure compensation by a factor of two.
 automatic exposure at EV 0
 exposure compensation at EV +5 helps to bring out the detail otherwise lost
Of course, if you shoot in RAW, exposure adjustment can be easily achieved by modifying the photograph via image editing software (such as Adobe Camera Raw). JPEG encoded images can also be adjusted for exposure, however, the results are limited as not as much information is stored in this format.

No comments:
Post a Comment